

FAQs
WHAT’S A POWERBIN?
A PowerBin is a term we created that implies an Avid Media Composer Bin (.avb file) containing ready-made nested effects in the form of sequences.
It’s a PowerBin because it holds the power of lifting the visual and editorial qualities of your edits.
FXSyndrome offers two types of PowerBins:
1- A Boris Continuum Complete plugin-required PowerBin.
2- A No-Plugin required PowerBin.

HOW IT WORKS?
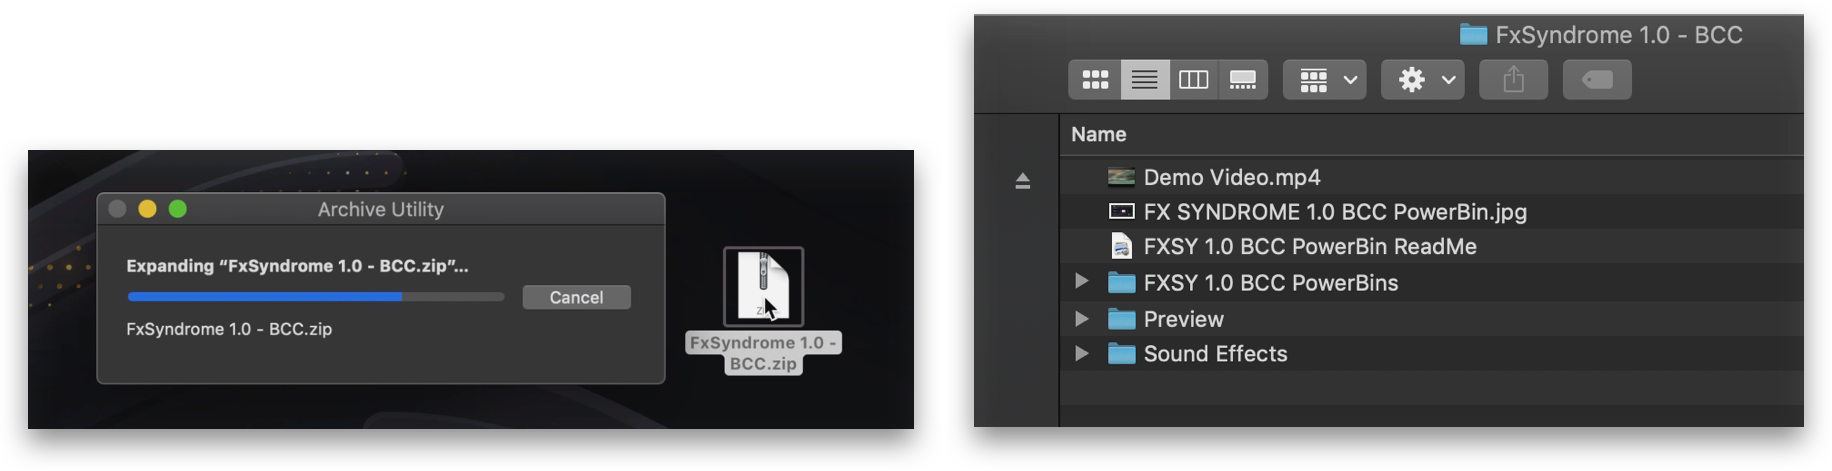
1- Start by unzipping the downloaded file and creating a backup of the unzipped folder.
Inside the folder you should find the following:
- FXSY PowerBin .avb file in different frame rates option (23.976fps, 24fps, 25fps, 29.97fps, 30fps).
- Sound effects folder with the same frame rates option.
- Effects Preview folder in .mp4 video file.
- Documentation pdf.
- Demo Video.
- Product cover.
2- Moving the effects into an Avid project (No installation required)
Copy the unzipped folder into a location of your choice then move the .avb file(s) into your desired Avid project(s) folder. Alternatively, from within your Avid Project choose "Open Bin".
Default Avid Project “Private” location on a Mac (Mac -> Users -> username -> Documents -> Avid Projects -> project name).
Default Avid Project “Private” location on a PC (C:\Users\ username\Documents\Avid Projects\ project name).
Note that the .avb PowerBin file should match with its frame rate that of the project you are moving it into;
i.e., the 30fps PowerBin should be moved to a 30fps project, otherwise, in case you have a mismatched frame rate, you can always readapt the effects (sequences) by double-clicking them inside of Avid.

3- Once you open the designated Avid project, you should find the FXSY PowerBin already there.
Inside the PowerBin you will find a list of effects in the form of sequences:
50 in the case of a BCC powered bundle and 45 in the case of a No-Plugin required bundle.

4- Previewing the effects
These effect sequences are empty and locked; they are designed to operate without any embedded footage
or footage replacement inside of them
(except for some Titles that can be easily recreated).
To view the effects, you need to check the Effect Preview folder where you can find the relevantly labeled video files.
You can also Link/import these video files inside of Avid for your convenience.

5- Applying the desired effect
Drag the desired effect sequence into the source monitor, position the player head at the beginning of the effect sequence (in the source monitor), then drop it (by drag or overwrite) on an empty track above your footage.
Adjust the position of the Yellow Marker (which also holds the name of the effect and its frame rate) above your cut while having the viewer active on the footage track beneath (for smoother performance), then perform a Step In into the effect layer.
You will now see all the stacked effects labeled on separate layers. (Each layer is a single effect type)
Select all the layers, hit in and out and render all (this method makes the render faster than rendering the Submaster effect from the outside).
Once the render is done, you can now Step Out of the effect, hit play and see the magic happens!
Note that some effects can have two Yellow Markers, which means they can accommodate two shots if desired.


6- Sound Effects
After applying the effect, you can now use its respective high-quality sound effect from the Sound Effects folder.
Import the sound effect with the relevant frame rate and place it under the effect location. The sound effect length should match precisely that of the effect.
In case it doesn’t, there is a chance that you imported the wrong frame rate audio file.
Note that not all effects have a sound effect designed for them.

EFFECTS STRUCTURE
Each effect comes in the form of a sequence that is a Submaster effect in Avid’s language.
The Yellow Marker on each effect shows where the next cut can be placed and selecting the Yellow Marker will also reveal additional info like the name of the effect and its frame rate.
Stepping inside the effect will reveal the different layers that make the effect.
Each layer contains a single type of effect with a clear label.
Not all effects have the same number of layers or the same type of effects; some of them can be much more complex with several levels of nesting.
When you see a layer labeled in the following format:
Effect name A - [effect name B] it means that effect B is nested inside effect A. If you Step inside effect A, you will be able to see effect B.
When you see the following:
Effect name A - [effect name B] [effect name C] it means that effect B and C are both nested inside effect A. Stepping In will reveal them.

SPECIAL EFFECTS
TEXT EFFECT (UP/DWN) INCLUDED FOR TITLE TOOL AND TITLER+
Initially, this effect will be in an offline state since the Title Media needs to be re-created.
To change the text in the TEXT (UP/DWN) effect, you need to be in an HD project or lower.
If you are working in a UHD project or higher, change the settings to HD, edit the text, then revert to your initial project settings.
Do not convert or replace the Title effect with the Title+ effect as Avid might require so.
You need to perform a Step In ![]() twice into the layer “TEXT TO CHANGE” to reach the Title effect that you can edit.
twice into the layer “TEXT TO CHANGE” to reach the Title effect that you can edit.

1- Re-create the Title Media.
2- Edit the Title Text using the Effect Editor.

TRIMMING
The effects are nicely paced so that you don’t need to trim them. However, if you still need to do so, you can either duplicate the effect, or you can move the nested effects outside the nest and tweak them there, in other words, get rid of the Submaster. The Keyframes in most of the effects are set to "Elastic", so if you change the effect duration by trimming, the effect will look faster or slower. You can change the keyframes to "Fixed" if you don't want to affect their speed while trimming.
FRAME-RATE COMPATIBILITY
We have applied most of the commonly used frame-rates in our effects to save you that extra conversion click. However, you can still convert the effects yourself (in case you've used the wrong frame-rate, or if you wish to use a frame-rate that isn't provided) by simply double-clicking the effect sequence and Avid will instantly create a new converted effect sequence for you.
The officially supported frame-rates are 23.976fps, 24fps, 25fps, 29.97fps, 30fps, and equivalent in interlaced.
Note, when working in interlaced projects, the effects rendering time may be longer.
MINIMUM SYSTEM REQUIREMENTS
(depends on your project resolution and used codecs)
A 64-bit processor and operating system (for certain effects to run)
Processor: Quad-Core 3.0 GHz Intel Core i7 (or equivalent)
Memory: 32 GB DDR3 (recommended)
Graphics (No-Plugin Option): 4 GB (Avid Media Composer recommended graphic cards)
Recommended Graphics (Boris CC Option): High-end NVIDIA Quadro, TITAN or GeForce Pascal, e.g. Quadro P5000 or GeForce GTX 1080 Ti.
Software: Requirements displayed on each product page
WHAT DOES THE MASTER COLLECTION INCLUDE?
The Master Collection will keep growing, and it will include all our future products.
At the moment, the Boris CC option includes Volume 1 Boris CC option, Volume 2 Boris CC option, and the GLITCHES Pack.
The No-Plugin option includes Volume 1 No-Plugin option, Volume 2 No-Plugin option, and the GLITCHES Pack.
IS THERE A TRIAL OR A DEMO?
Because of their nature; unfortunately, presets and templates do not offer trial modes.
DO I GET FREE UPDATES?
For Master Collections, and the GLITCHES Pack, all future effect additions will be available for free. You will receive an update by email for you to download the newly added effects.
For Volume 1 and Volume 2, there will be no effects addition, however, you will receive free updates whenever we tweak or enhance the existing effects.
CAN I UPGRADE?
Yes, you can upgrade from the No-Plugin option to the Boris CC option with a 20% discount. Simply drop us an email whenever you wish to do so.
HOW MANY SEATS DOES THE LICENSE COVER?
The Three-seat license covers three different machines. The Multi (more than three seats) license covers as many machines as you need.
Both types of licenses cover all types of commercial and non-commercial work.